How to eSign a PDF (And What Actually Makes a Signature Count)
The moment that trips people up isn't signing the PDF. It's the small panic beforehand: does a signature I drew with a mouse actually count?
For the vast majority of everyday documents — a contract with a client, a rental agreement, a consent form, an offer letter — the answer is yes. Most countries have recognised electronic signatures as legally valid for years, under laws like the ESIGN Act in the US and eIDAS in the EU. What generally makes one hold up is intent and agreement: that you meant to sign, that both sides consented to sign electronically, and that the signed document is kept as-is afterwards. A typed name, a drawn squiggle, or an uploaded image of your handwriting can all satisfy that.
There's a narrow set of documents that often still demand wet ink or a notary — wills, some property deeds, certain court filings — and those vary by country. If a document is in that category, it usually tells you. For everything else, signing on screen is not a workaround; it's the normal way it's done now.
With that settled, the actual signing takes about a minute.
The idea: you're placing particles on a page
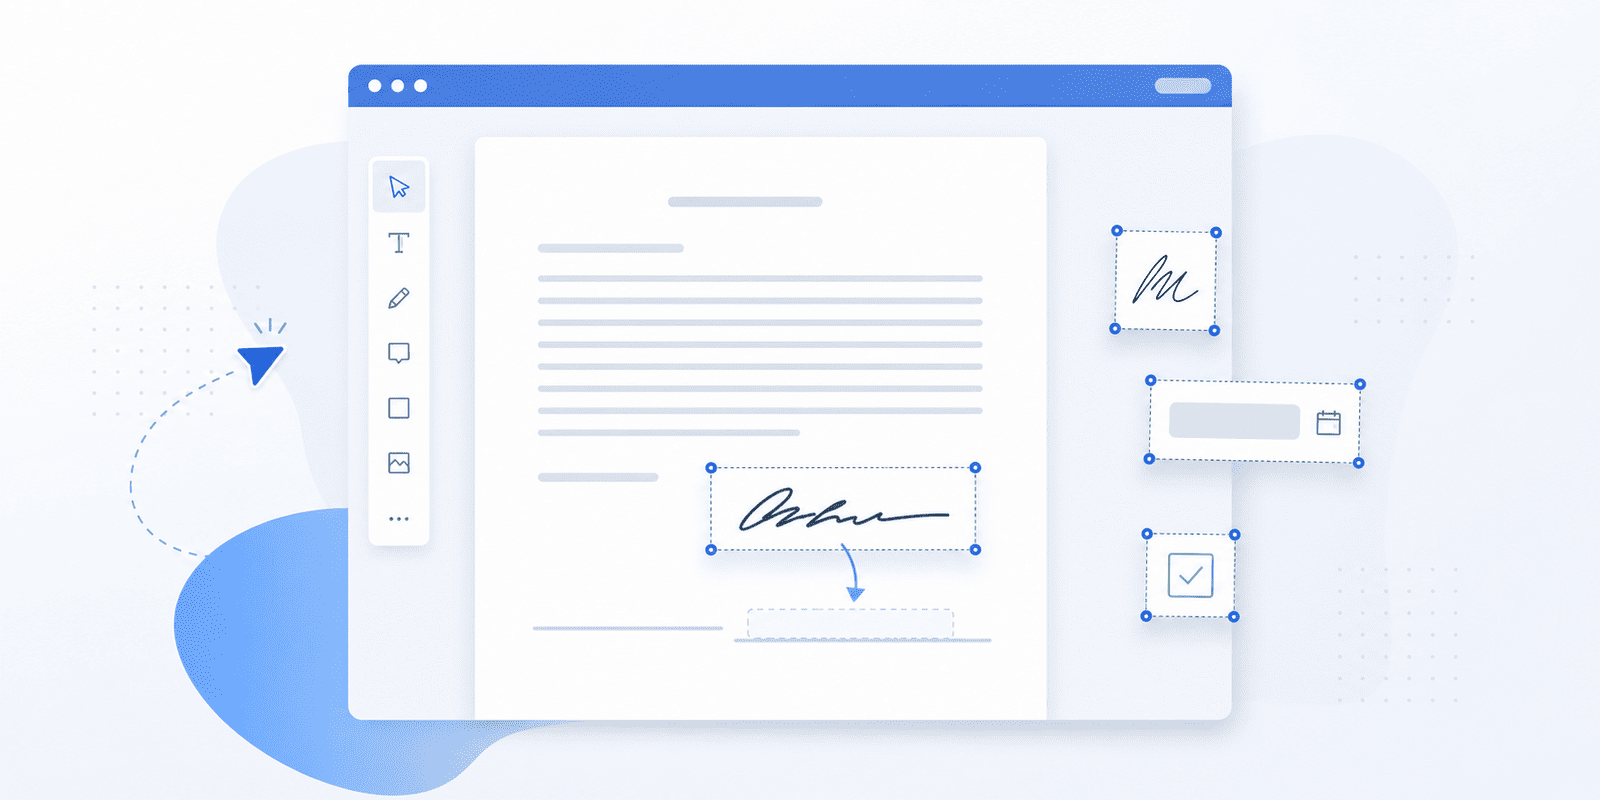
The whole tool works on one concept. You add small movable objects — a signature, your initials, a date, a checkbox — and drop each one exactly where it belongs on the page. Every object is resizable and draggable, so nothing is locked to a grid. You're arranging pieces onto the document, not filling in a rigid form.
Open the sign tool, select your PDF, and it loads ready to sign. Everything below is a button that drops one of these pieces onto the page.
Adding your signature
Click Your signature and a pop-up gives you three ways to make one:
- Draw — sign with your mouse, trackpad, or finger on a touchscreen. This is the closest to signing on paper, and a phone or tablet gives you the most natural result.
- Type — type your name and pick from a set of handwriting-style fonts. The fastest option, and perfectly valid.
- Upload — drop in an image of your real signature. If you've scanned or photographed your handwritten signature once, you can reuse it on everything.
Whichever you choose, the signature then drops onto the page as a movable object. Drag it onto the signature line, and pull a corner to size it so it sits naturally rather than swamping the line.
Initials, for the pages in between
Many multi-page contracts ask you to initial each page as well as sign the last one. Your initials works exactly like the signature button — the same draw, type, or upload pop-up — and produces a compact mark you can drop into the corner of every page that needs one.
Set them up once, then place a copy wherever required.
Dates, checkboxes, and free text
Three more pieces cover the rest of what a form asks for.
Date drops in today's date as text — useful for the "dated this ___ day of ___" line, without typing it out.
Checkbox adds a tick box you can place beside an option and resize to match the boxes already printed on the form.
Additional text is the flexible one: a text object you can drop anywhere and style properly — font, colour, bold, italic, underline, strikethrough, alignment, line and letter spacing, capitalisation, even transparency. This is what you use to fill in a name, an address, a reference number, or anything the document expects in writing. Like everything else, it's draggable and resizable, so it lands precisely on the line rather than floating near it.
The whiteout tool, for fixing what's already there
One piece does something the others don't. Whiteout drops a white box onto the page that you can size and position over existing content — covering it cleanly, the way correction fluid does on paper.
It's there for the small, legitimate fixes forms need: blanking an outdated address before you write the correct one above it, covering a pre-filled field that no longer applies, or clearing a line so your own text reads cleanly. Drop the white box, size it over what you're replacing, then add your text on top.
A fair word on this: whiteout is for correcting your own documents and forms, not for altering the terms of an agreement someone else has signed or is relying on. Used honestly, it saves you reprinting a whole form over one wrong line.
A quick run-through: signing a two-page agreement
Say a client sends a two-page service agreement.
Open it in the sign tool. On page one, add your initials and drop them in the bottom corner. On page two, click Your signature, draw it once, and drag it onto the signature line — then size it so it sits on the line, not across three others. Add the Date piece next to it. There's a printed box asking you to confirm you've read the terms, so drop a Checkbox onto it. The reference number field is blank, so use Additional text to fill it in, matching the document's font size. Download, send it back. Under two minutes, no printer involved.
Signing on your phone
The draw option is noticeably better with a finger than a mouse, so if you want a signature that looks like your real one, sign on a phone or tablet. Everything else — placing, resizing, dragging — works the same on a touchscreen, and the finished PDF is identical regardless of the device you signed on.
A note on keeping the signed copy
Once you've signed and downloaded, keep that downloaded PDF as your record and send that exact file. Part of what gives an e-signature its weight is that the signed document isn't altered afterwards, so the version you save is the version everyone relies on. Don't re-edit it after signing unless you're re-signing the corrected copy.
Sign your PDF now
Signing a PDF on screen is the normal, accepted way to handle almost every everyday agreement. Make a signature by drawing, typing, or uploading it, drop it onto the line, add initials, a date, or a checkbox wherever the form asks, and download the finished file. No printing, no scanning, no posting anything back.